Building a Trivia Bot for Facebook Messenger with Laravel (Part 4)
Okay, first we laid the groundwork for our bot, then we gave it some basic functionality, and then we made the bot a lot more intuitive by utilising some Messenger Platform Components. In this part, we’ll be learning about how to use something called the Messenger Profile API, and implementing it to make the UX of our bot even better.
The Messenger Profile API (documentation) is a toolbox provided by the Messenger Platform as “the central store for your bot’s properties”. Some of the more common features it includes are:
- The Get Started button: a button that first time users of your bot see. Tapping this button allows you to begin the conversation by educating the users on what your bot can do.
- The greeting text. A user sees this before the conversation starts, so this is where you can shape their expectations. Together with the Get Started Button, this forms the welcome screen.
- The persistent menu: a menu that’s always available in the conversation. You can use this to add shortcuts to specific points of functionality of your bot.
- Account linking, which enables you to connect a user’s account on your app/site with their Messenger account
We’ll be implementing the first three features in our bot today. Let’s dive right in!
Creating Artisan Commands
This isn’lt directly related to bot-building, but it’s a Laravel feature, and one that we’re going to make use of, so I’ll run through it briefly.
If you’re familiar with Laravel, then you don’t need any introduction to artisan. If you aren’t, artisan is the name of a command-line tool that ships with the framework. Its quite powerful,and we’ve already made use of it a couple of times in earlier installments. However, today, we’ll be extending it by creating our own commands.
Why do we need to create our own commands? The actions to be performed in this part are one-time configuration actions (viaAPI requests) that we initiate (that is, they can’t be triggered by a user). Having an artisan command that does this means we can simply run it from our local repo whenever we decide to change any of our Messenger Profile details.
The Greeting Text
First, let’s set the greeting text for our bot. To do that, we need to make a POST request to <https://graph.facebook.com/v2.6/me/messenger_profile?access_token=YOUR_PAGE_ACCESS_TOKEN>. The body of the request should be in this format (JSON):
"greeting": [
  {
    "locale": "default",
    "text": "our greeting text"
  }
]
greeting is an array of greetings for different locales (such as “en” for English, “fr” for French, “es” for Spanish, or “default” to specify a default greeting text). We’ll set a greeting for only the default locale here.
As mentioned earlier, we’ll use an artisan command to do this. Here’s the kind ofcommand we want:
php artisan bot:greeting:set "Hello there!" --locale=en
where the text in quotes is our greeting text, and locale is optional
We start by creating the command class. Run:
php artisan make:command SetGreetingText
This creates a class called SetGreetingText in the directory app/Console/Commands . Open the file and change the $signature and $description properties to look like these:
protected $signature = 'bot:greeting:set {text} {--locale=default}';

protected $description = 'Sets the greeting text for our bot';
The signature is merely the format of the command we run on the command line to execute this, while the description shows up when we run php artisan help , just to remind us what the command does.
You’ll notice the handle() method. This is where we are to place the logic we want executed when the command runs. Let’s do that now:
public function handle()
{
    $data = [
        "greeting" => [
            [
            "locale" => $this->option("locale"),
            "text" => $this->argument("text")
            ]
        ]
    ];
$ch = curl_init('https://graph.facebook.com/v2.6/me/messenger_profile?access_token=' . env("PAGE_ACCESS_TOKEN"));
    curl_setopt($ch, CURLOPT_RETURNTRANSFER, true);
    curl_setopt($ch, CURLOPT_HEADER, false);
    curl_setopt($ch, CURLOPT_HTTPHEADER, ["Content-Type: application/json"]);
    curl_setopt($ch, CURLOPT_POST, true);
    curl_setopt($ch, CURLOPT_POSTFIELDS, json_encode($data));

    $result = json_decode(curl_exec($ch), true);
    $this->info(print_r($result);
}
We use the methods $this->option() and $this->argument() to access the values of the option and argument we specified. Then we buildup the request body, send the data, and echo the result to the terminal. Easy as pie!
Finally, we’ll register the command so artisan can know it exists. To do this, open the file app/Console/Kernel.php and add your command class’ name to the $commands array.
protected $commands = [
    Commands\SetGreetingText::class
];
So we run our command…

And if we check it out on Messenger:
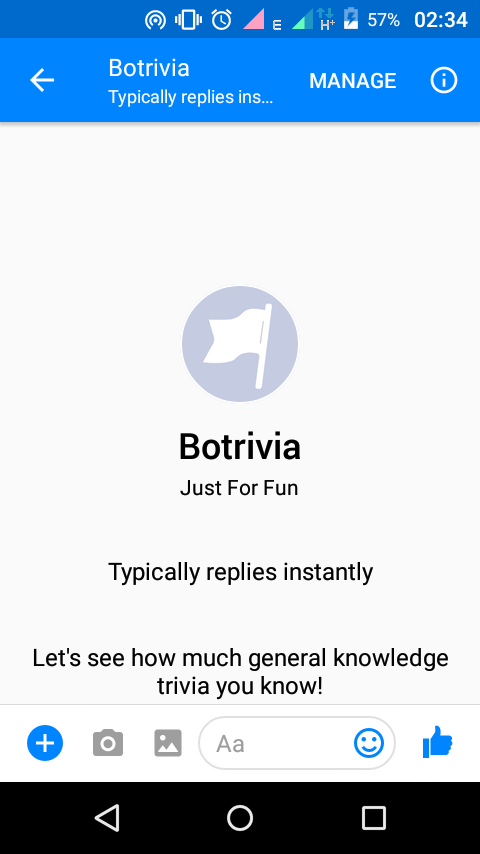
Note: if you already have an existing conversation with your bot, you’ll need to visit http://m.me/<your-page-username> on desktop and click the gear icon, then select “Delete” so you can see the Welcome Screen.
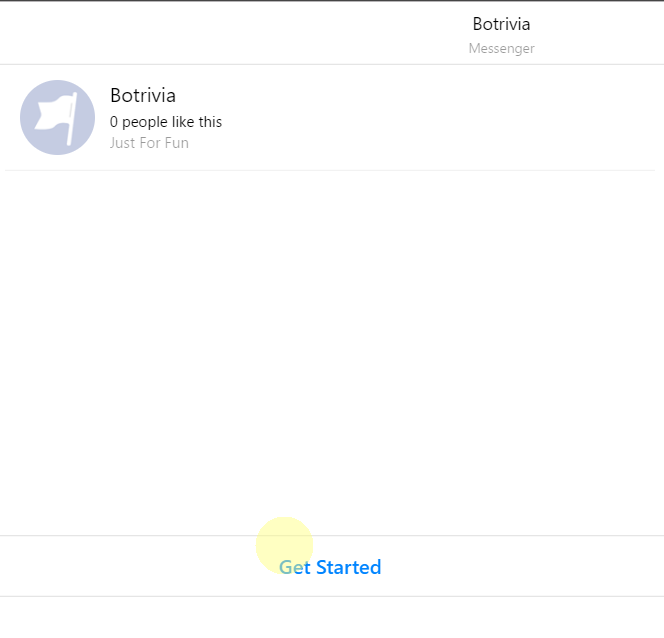
The Get Started button and initial message
Setting a Get Started button involves another POST request to the same URL, and then some more. When a user clicks the button, a postback is sent to us with the payload we defined, so we can then respond with an initial message.
First, let’s set up the command to create the button.: php artisan make:command SetGetStartedButton. Similar to what we did before, we define the signature and description.
protected $signature = 'bot:getstarted:set {payload}';

protected $description = 'Create the Get Started button';
And then the logic:
public function handle()
{
    $data = [
        "get_started" => [
                "payload" => $this->argument("payload"),
            ]
    ];
    $ch = curl_init('https://graph.facebook.com/v2.6/me/messenger_profile?access_token=' . env("PAGE_ACCESS_TOKEN"));
    curl_setopt($ch, CURLOPT_RETURNTRANSFER, true);
    curl_setopt($ch, CURLOPT_HEADER, false);
    curl_setopt($ch, CURLOPT_HTTPHEADER, ["Content-Type: application/json"]);
    curl_setopt($ch, CURLOPT_POST, true);
    curl_setopt($ch, CURLOPT_POSTFIELDS, json_encode($data));

    $result = json_decode(curl_exec($ch), true);
    $this->info(print_r($result));
}
Don’t forget to register it in our Kernel.php :
protected $commands = [
    Commands\SetGreetingText::class,
+   Commands\SetGetStartedButton::class
];
We’re done with creating the Get Started button, but we need to set up the initial message to handle the postback when a user clicks on the button.
Remember our extractData() method (in our Bot class from Part 2)? Its job was to parse a messaging object of type message and return an array containing the type of the message and any data we needed from it. And then, in Part 3, we renamed it to extractDataFromMessage() and created its counterpart extractDataFromPostback() . We assumed all postbacks would only come from our answer message buttons, but we’ve seen now that they could also be triggered by the Get Started button. Let’s update the logic to handle that..
public function extractDataFromPostback()
{
    $payload = $this->messaging->getPostback()->getPayload();
    //is it an answer to a question
    if (preg_match("/^(\\w)\$/i", $payload)){
        return [
            "type" => Trivia::$ANSWER,
            "data" => [
                "answer" => $payload
            ]
        ];
      //or a Get Started button click?
    } else if ($payload === "get-started") {
        return [
            "type" => "get-started",
            "data" => []
        ];
    }
    return [
        "type" => "unknown",
        "data" => []
    ];
}
And then we update the handle() method of our BotHandler to look like this:
public function handle()
{
    $bot = new Bot($this->messaging);
    $custom = $bot->extractData();

    //a request for a new question
    if ($custom["type"] == Trivia::$NEW_QUESTION) {
        $bot->reply(Trivia::getNew());
    } else if ($custom["type"] == Trivia::$ANSWER) {
        if (Cache::has("solution")) {
            $bot->reply(Trivia::checkAnswer($custom["data"]["answer"]));
        } else {
            $bot->reply("Looks like that question has already been answered. Try \"new\" for a new question");
        }
    } else if($custom["type"] == "get-started") {
        $bot->reply("Hi there! Welcome to botrivia! You can type \"new\" to get a new question, but why don’t we start with this one?");
        $bot->reply(Trivia::getNew());
    } else {
        $bot->reply("I don't understand. Try \"new\" for a new question");why
    }
}
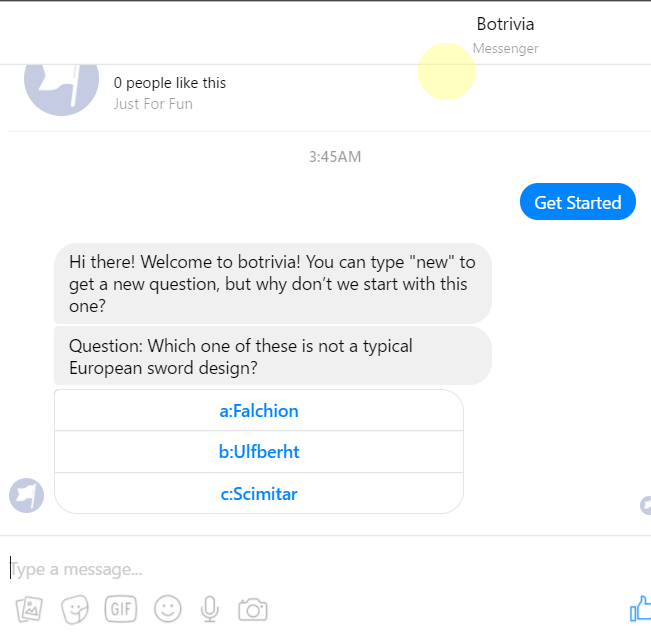
So, if a user taps the Get Started button, we send them a greeting message, and get them hooked by starting them off with a question.
That’s all we need to do. Deploy your changes, run the command php artisan bot:getstarted:set “get-started" and restart the Messenger thread.
Persistent Menu
The last thing we’ll do is add the menu to our bot. My menu will contain just two items: a button that links to the github repo for this bot and another that links to the first tutorial article.
Once again, we create the artisan command and run it:
# command line:
php artisan make:command SetPersistentMenu

# in app/Console/Commands/SetPersistentMenu.php:
protected $signature = 'bot:menu:set {--locale=default}';

protected $description = 'Create the persistent menu for the bot';
So our handle() method looks like this now:
public function handle()
{
    $data = [
        "persistent_menu" => [
            [
                "locale" => $this->option("locale"),
                "call_to_actions" => [
                    [
                        "title" => "View source code",
                        "type" => "web_url",
                        "url" => "http://github.com/shalvah/botrivia",
                        "webview_height_ratio" => "full"
                    ],
                    [
                        "title" => "How to build this bot",
                        "type" => "web_url",
                        "url" => "https://tutorials.botsfloor.com/building-a-facebook-messenger-trivia-bot-with-laravel-part-1-61209b0e35db",
                        "webview_height_ratio" => "full"
                    ],
                ]
            ]
        ]
    ];
    $ch = curl_init('https://graph.facebook.com/v2.6/me/messenger_profile?access_token=' . env("PAGE_ACCESS_TOKEN"));
    curl_setopt($ch, CURLOPT_RETURNTRANSFER, true);
    curl_setopt($ch, CURLOPT_HEADER, false);
    curl_setopt($ch, CURLOPT_HTTPHEADER, ["Content-Type: application/json"]);
    curl_setopt($ch, CURLOPT_POST, true);
    curl_setopt($ch, CURLOPT_POSTFIELDS, json_encode($data));

    $result = json_decode(curl_exec($ch), true);
    $this->info(print_r($result));
}
As you can see, each of the buttons is of type web_url , which means they open an outside URI in a webview in the Messenger app.
Finally, we run the command php artisan bot:menu:set, then clear the Messenger thread so it can reload the menu, and you should see your changes live:
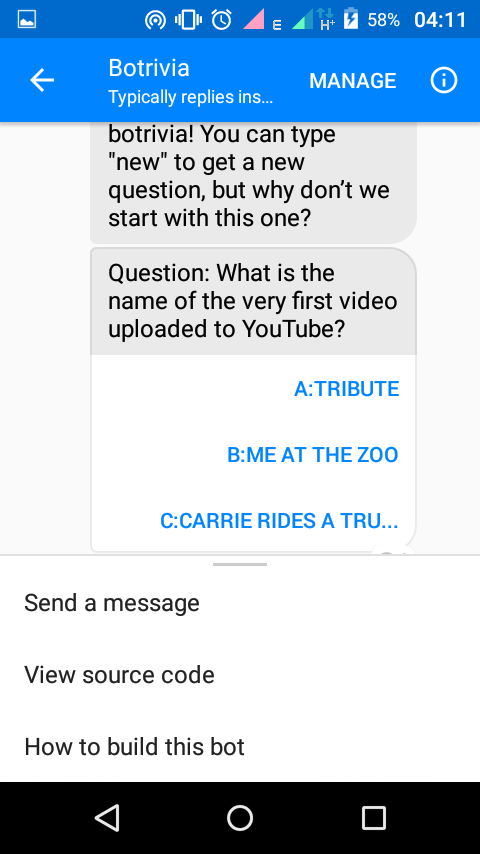
 It works!
Note that Messenger automatically adds a “Send Message” option that takesa user back to the message text box.
So there you have it. With our greeting text, Get Started button and welcome message, users who message our bot for the first time won’t be confused about what it is or what it can do. Much better than a blank screen, ay?
In the next installment, we’ll learn how to get user details (such as the user’s name, locale and gender) and use them to make the user feel more at home. Don’t miss it! Follow me to stay updated.
You can check out the github repo for the bot here.
As always, I’d appreciate your feedback. Let me know how you’ve been getting on thus far and how I can make the articles better. Thanks!
Next: Personalising the Experience with the User Profile API
Useful Links:
Messenger Profile - Messenger Platform - Documentation - Facebook for Developers
Artisan Console - Laravel - The PHP Framework For Web Artisans
Get Started Button - Messenger Platform - Documentation - Facebook for Developers
Onboarding - Messenger Platform - Documentation - Facebook for Developers
Persistent Menu - Messenger Platform - Documentation - Facebook for Developers
I write about my software engineering thoughts and experiments. Want to follow me? I don't have a newsletter; instead, I built Tentacle: tntcl.app/blog.shalvah.me.
